
Hamlet: The Comic Book
- Jakob Nielsen

- Mar 31
- 4 min read
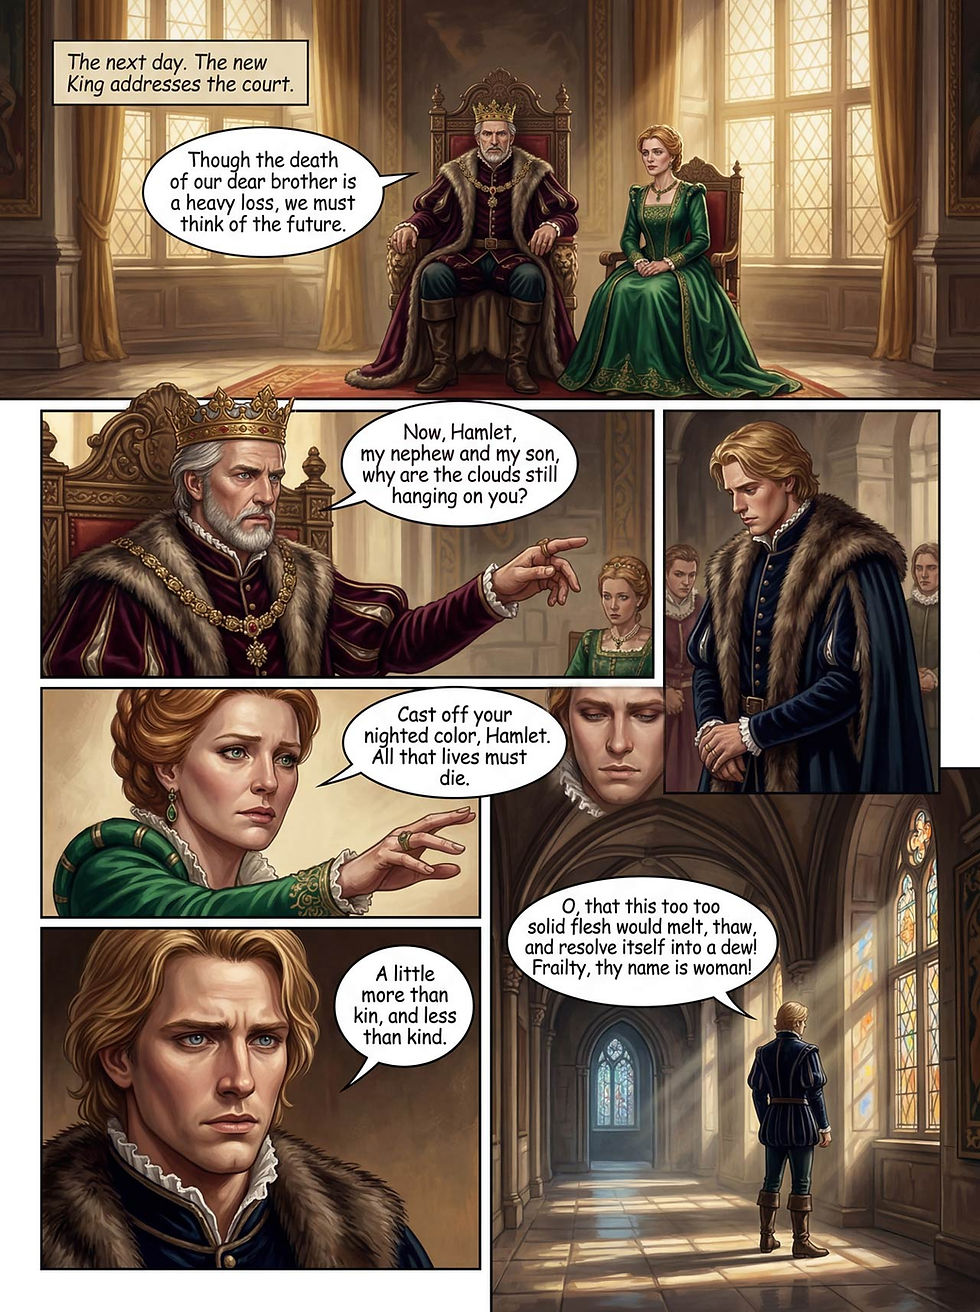
Summary: A 21-page comic book retelling William Shakespeare’s tragedy “Hamlet: Prince of Denmark.” Includes a description of the workflow used to produce the comics with Nano Banana 2.
See Also:
Hamlet Remixed: Using AI to Convert Content into Alternative Formats. Includes an alternate comic strip version of Hamlet set in the Viking Age instead of the Renaissance.
Hamlet, The Music Video (YouTube, 4 minutes)


Workflow Behind Hamlet as a Comic Book
I made this comic book with Nano Banana 2, which is currently the AI image model with the best prompt adherence. Even so, I had to generate multiple versions of most pages to get an image that would work.
I have accepted some degree of inconsistency in typography, art style, and even outfits to complete this project without spending a prohibitive number of AI credits. It cost me about $60 in AI credits on Higgsfield to make this comic book.
Style Exploration
My first step was to explore comic book styles, to pick one appropriate for Hamlet. I picked a single frame (the iconic graveyard scene with Yorick’s skull) and rendered it in 48 different comics styles, including American, European, and Asian styles. A few examples:


From this large set of options, I picked a few styles that I thought were the most promising and made a full page in each style. Instead of drawing a sample page from the plot, I composed a page with a frame from each of the play’s 5 acts, to better see how each style would work across the entire comic book.
Here are a few examples:

Classic Oil Paintings.

Watercolor.

Digital Painting.

Literary Graphic Novel.

Multicolor Ballpoint Sketches.

Manhwa.
I ended up selecting the following “European Album” style, which is similar to oil paintings, but with a 3D-rendered computer graphics feel:

European Album Style.
In these examples, you will notice several of those mistakes that current image models (even Nano Banana 2) still make:
Watercolor, Act V: Hamlet is dueling King Claudius instead of Laertes, and Hamlet speaks Laertes’s line from the duel scene, whereas the King speaks Hamlet’s line. It looks like Queen Gertrude is speaking Hamlet’s famous final line, “The rest is silence.”
Digital Painting, Act I: The lines of Hamlet and his Father’s Ghost are swapped.
Literary Graphic Novel, Act II: Hamlet speaks Polonius’s line “Though this be madness.” Act V: Laertes speaks Hamlet’s line “The point envenomed, too?”
European Album Style, Act I: The lines of Hamlet and his Father’s Ghost are swapped. Act V: Hamlet speaks Laertes’s line “I am justly killed,” and Laertes speaks Hamlet’s line “The rest is silence” (which also shouldn’t really be spoken while they are still fighting, but only when Hamlet dies).
I left all these errors in the style sample pages, since they were not for publication, but were intended solely to try out the styles on a complete comic page and to see how they handled the different characters and situations that would need to be drawn in the full book.
Character Reference Sheets
I then designed character reference sheets for all the main characters who would need to be repeatedly drawn across many pages. This improved character consistency, even if it didn’t ensure it completely. For the same reason, I made environment reference sheets for the main setting: Elsinore Castle, with both outside scenery and the main indoors locations. I modeled Elsinore Castle after a real Renaissance castle in Denmark, Kronborg. (Worth visiting.)


Storybook
The final step was to develop a written storybook that specified, for each of the 21 pages, how the page would be divided into frames and, for each frame, its setting, characters, speech bubbles, and caption boxes.
Here is the description of the first page of Act III:
Frame 1
Visual: European Album realism. A long, empty stone corridor within Elsinore Castle. Hamlet stands entirely alone, staring thoughtfully at the ground.
Caption: "Act Three. The King and Polonius spy from the shadows."
Speech Bubble Hamlet: "To be, or not to be, that is the question."
Frame 2
Visual: Ophelia enters the corridor timidly. She wears a soft lavender silk gown and holds out several small, elegant gifts.
Speech Bubble Ophelia: "My lord, I have remembrances of yours that I wish to return."
Frame 3
Visual: Hamlet looks deeply angry and betrayed. His deep blue eyes narrow sharply.
Speech Bubble Hamlet: "I never gave you anything."
Frame 4
Visual: Hamlet leans in extremely close to Ophelia, his face twisted in rage. Ophelia recoils in visible fear.
Speech Bubble Hamlet: "Get thee to a nunnery! Why would you breed sinners?"
Frame 5
Visual: Hamlet storms off in the background. In the foreground, Ophelia breaks down weeping, clutching her flawless face.
Speech Bubble Ophelia: "O, what a noble mind is here o'erthrown!"
Frame 6
Visual: Claudius and Polonius step out from behind an elaborate hanging tapestry. Claudius looks incredibly threatened and commanding.
Speech Bubble Claudius: "This is not love. He is dangerous. I will send him away to England."


